In this tutorial series, you’ll learn how to get started with creating an Angular web app using Angular 6, Flask and MongoDB.
In this part of the tutorial, you’ll be creating the Angular web app components to add and list the contacts. You’ll learn how to use Angular material to create the user interface.
Source code from this tutorial is available on GitHub.
Getting Started With Web App Using Angular 6
Before getting started with creating a web app using Angular 6, make sure you have the latest Angular CLI.
Let’ get started with creating a web app using Angular CLI. Create the web app project structure using the Angular CLI.
## creating Angular project structure
ng new ContactManager
The above command will create the Angular project structure.
By default you’ll have the AppComponent bootstrapped to the NgModule. Let’s make it a bit more structured. Create a new component called root which will serve as the base component.
## create a the root component
ng generate component root
Delete all the AppComponent files from app/ folder. Bootstrap the RootComponent in the NgModules in the app/app.module.ts file. Here is how the app.module.ts file looks:
import { BrowserModule } from '@angular/platform-browser';
import { NgModule } from '@angular/core';

import { RootComponent } from './root/root.component';

@NgModule({
  declarations: [
    RootComponent
  ],
  imports: [
    BrowserModule
  ],
  providers: [],
  bootstrap: [RootComponent]
})
export class AppModule { }
Save the above changes and start the web app using the following command:
## run the server
ng serve
You will have the web application running at http://localhost:4200.
Using Angular Material In Angular Web App
You’ll be using Angular Material for developing the user interface of the Angular contact manager web app. Angular 6 provides a new CLI command which makes it easier to add dependencies to the project. From the official documentation,
ng addwill use your package manager to download new dependencies and invoke an installation script (implemented as a schematic) which can update your project with configuration changes, add additional dependencies (e.g. polyfills), or scaffold package-specific initialization code.
Execute the following command to add Angular material to the contact manager web app.
## Command to add Angular material
ng add @angular/material
Once you have the Angular material added to the project, create a file called material.module.ts inside the app folder. You’ll be keeping a separate NgModule for importing and exporting Angular material elements. Here is how app/material.module.ts file looks:
import { BrowserModule } from '@angular/platform-browser';
import { NgModule } from '@angular/core';

import { MatButtonModule, MatCardModule, MatIconModule, MatTabsModule,
MatFormFieldModule, MatSelectModule, MatInputModule } from '@angular/material';

@NgModule({
  imports: [MatButtonModule,
    MatCardModule,
    MatIconModule,
    MatTabsModule,
    MatFormFieldModule,
    MatSelectModule,
    MatInputModule],
  exports: [MatButtonModule,
    MatCardModule,
    MatIconModule,
    MatTabsModule,
    MatFormFieldModule,
    MatSelectModule,
    MatInputModule]
})
export class MaterialModule { }
I have already included the list of the Angular material modules you’ll be using for building this project.
Import the MaterialModule inside the AppModule and include it in the list of imports. Here is how the app.module.ts file looks:
import { BrowserModule } from '@angular/platform-browser';
import { NgModule } from '@angular/core';

import { RootComponent } from './root/root.component';
import { BrowserAnimationsModule } from '@angular/platform-browser/animations';
import { MaterialModule } from './material.module';

@NgModule({
  declarations: [
    RootComponent
  ],
  imports: [
    BrowserModule,
    BrowserAnimationsModule,
    MaterialModule
  ],
  providers: [],
  bootstrap: [RootComponent]
})
export class AppModule { }
Creating Contact List Angular Component
You’ll be creating a separate component for listing the contacts in the Angular contact manager app. Use the Angular CLI command to setup a new Angular component for contact list.
## Create Angular component
ng generate component contact-list
The above command generates the default files for the contact list component. Inside the app folder you’ll be having a folder called contact-list which will have the component related class files and the related template files.
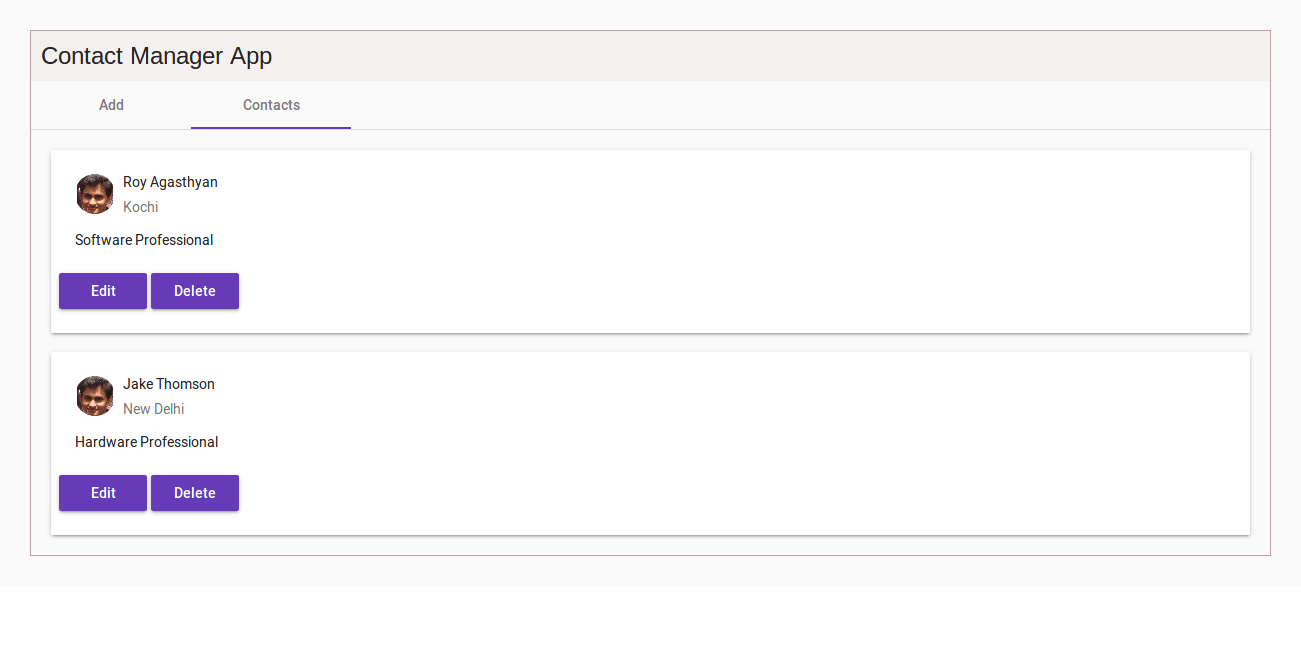
Add the following HTML code to the contact-list.component.html file:
<div class="listcontainer">
    <mat-card class="example-card">
      <mat-card-header>
        <div mat-card-avatar class="example-header-image"></div>
        <mat-card-title>Roy Agasthyan</mat-card-title>
        <mat-card-subtitle>Kochi</mat-card-subtitle>
      </mat-card-header>
      <mat-card-content>
        <p>
          Software Professional
        </p>
      </mat-card-content>
      <mat-card-actions>
        <button color="primary" mat-raised-button>
          Edit
        </button>
        <button color="primary" mat-raised-button>
          Delete
        </button>
      </mat-card-actions>
      <mat-card-footer>
      </mat-card-footer>
    </mat-card>

    <br />

    <mat-card class="example-card">
      <mat-card-header>
        <div mat-card-avatar class="example-header-image"></div>
        <mat-card-title>Jake Thomson</mat-card-title>
        <mat-card-subtitle>New Delhi</mat-card-subtitle>
      </mat-card-header>
      <mat-card-content>
        <p>
          Hardware Professional
        </p>
      </mat-card-content>
      <mat-card-actions>
        <button color="primary" mat-raised-button>
          Edit
        </button>
        <button color="primary" mat-raised-button>
          Delete
        </button>
      </mat-card-actions>
      <mat-card-footer>
      </mat-card-footer>
  </mat-card>
</div>
Add the following code to the contact-list.component.css file:
.example-header-image {
  background-image: url('../../assets/profile.jpg');
  background-size: cover;
}

.listcontainer{
    padding: 20px;
}
Here is how it will look :
Creating Add Contact Angular Component
Similar to how you created the Angular component for listing the contacts, create an Angular component for adding contacts.
## Create Angular component
ng generate component contact-add
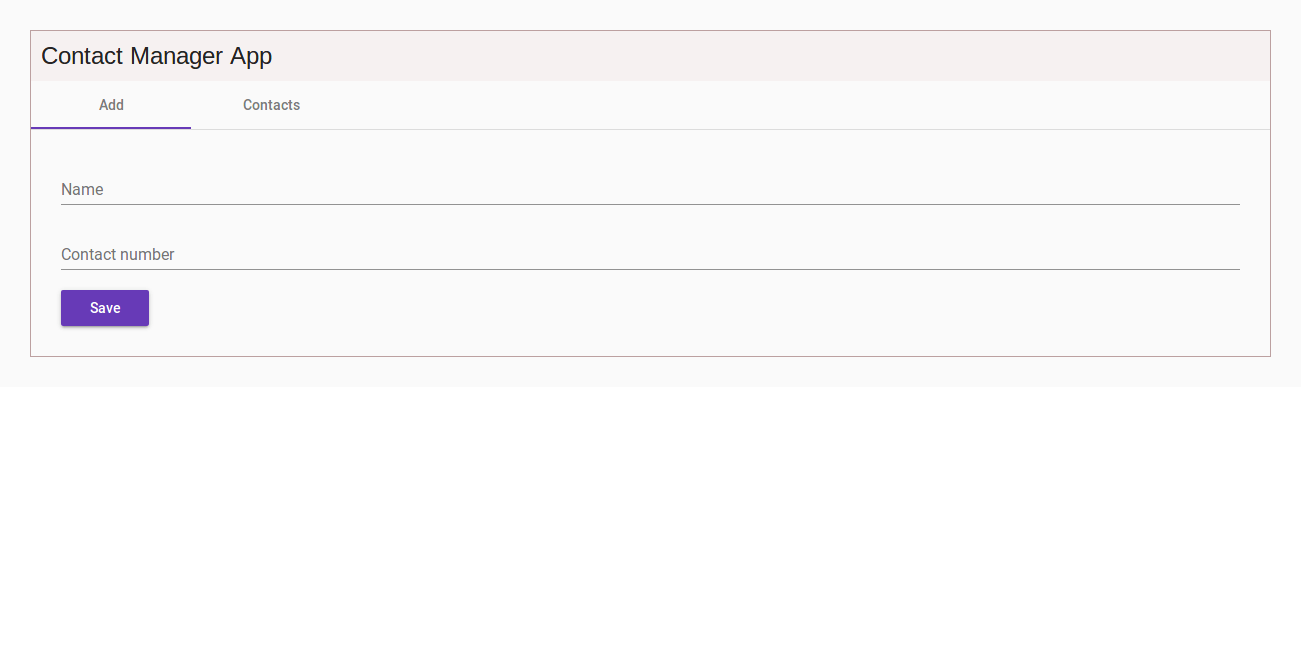
Add the following HTML code to the contact-add.component.html file:
<div class="example-container">
  <mat-form-field>
    <input matInput placeholder="Input">
  </mat-form-field>

  <mat-form-field>
    <input matInput placeholder="Input">
  </mat-form-field>

  <div>
    <button color="primary" mat-raised-button>
          Save
    </button>
  </div>
</div>
Add the following CSS code to the contact-add.component.css file:
.example-container {
    padding: 20px;
    margin: 10px;
    display: flex;
    flex-direction: column;
}

.example-container > * {
  width: 100%;
}
Here is how it looks :
Creating Contact Manager App
Since both the components are ready, you simply need to use both the components in the RootComponent to integrate the design. Add the following HTML code the root.component.html file :
<div class="container">
    <div class="header">
        <span>
            Contact Manager App
        </span>
    </div>
    <div class="content">
        <mat-tab-group>
          <mat-tab label="Add">
            <app-contact-add></app-contact-add>
          </mat-tab>
          <mat-tab label="Contacts">
            <app-contact-list></app-contact-list>
          </mat-tab>
        </mat-tab-group>
    </div>
</div>
Add the following code the root.component.css file:
.container{
    border : 1px solid #bca0a0;
}
.header{
    height: 50px;
    line-height: 50px;
    background-color: #f6f1f1;
}
.header span{
    font-family: Arial, Helvetica, sans-serif;
    padding: 10px;
    font-size: 24px;
}
Save the above changes and start the application using the following command :
## restart the Angular app
ng serve
You will have the contact manager web app using Angular 6 running at http://localhost:4200.
Wrapping It Up
In this tutorial, you learn how to get started with creating a contact manager web app using Angular 6. You created the add and listing component for the Angular web app.
In the next part of the tutorial, you’ll learn how to create REST APIs using the Python Flask & MongoDB.
Do let us know your thoughts in the comments below.